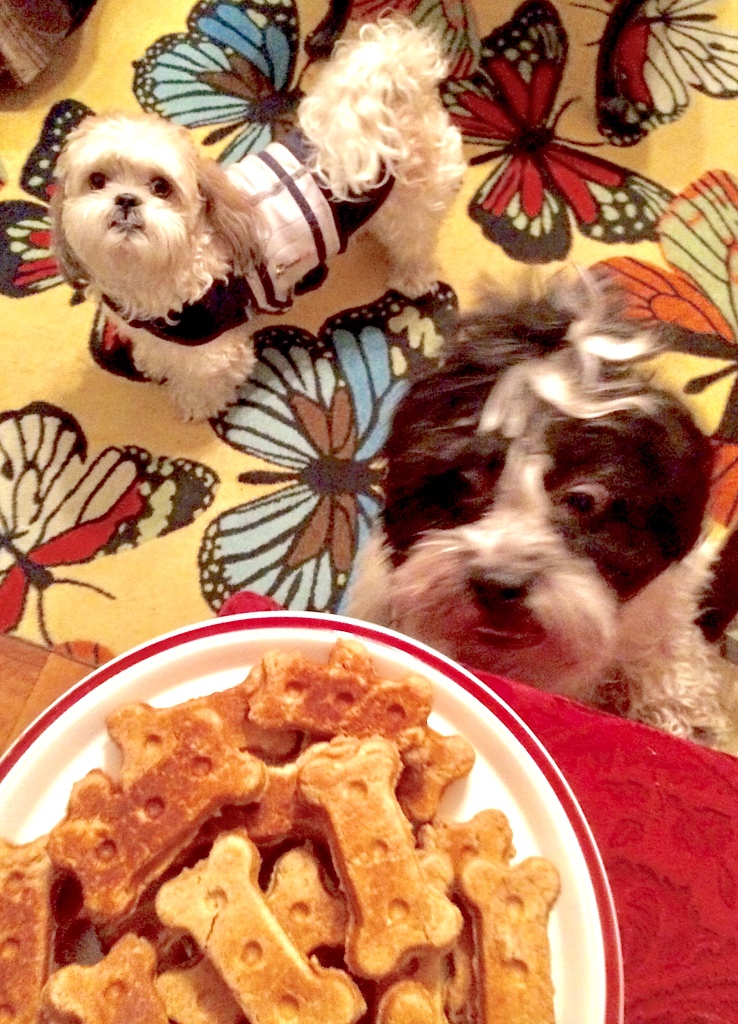
Peanut Butter Pumpkin Bones
Dog treats can be expensive, and when you look at all the ingredients they put in them, well, most are not the healthiest of choices. I like to know what exactly is in my treats and my boys, Gaspard and Marcel, absolutely love these Peanut Butter Bones.
Ingredients
- 2 1/4 cups whole-wheat flour (we use King Arthur ~ see bottom of page for link)
- 1 tbsp, baking powder
- 1/2 can of pure pumpkin (use the other half to add to their food – as pumpkin is very healthy for our furry loves and their digestive system)
- 1 cup of all natural peanut butter (chunky or smooth) Note: make sure you are getting ‘All natural peanut butter’ otherwise you will be feeding your dog large doses of sugar laden peanut butter (the regular kind) – definitely not a healthy way to go. Also, it’s very important to know that in some countries, they make peanut butter, advertising it as light, lite, or sugar free or natural by using an artificial sweetener called “Xylitol”. You must read the labels of any peanut butter you are going to feed your furry love to see if the ingredient Xylitol is in it. Xylitol is complete poison for dogs and it will kill them, even in small doses. Please be sure to check all peanut butter labels before buying.
- 1 teaspoon of unrefined coconut oil (melted)
- 1/4 teaspoon of cinnamon
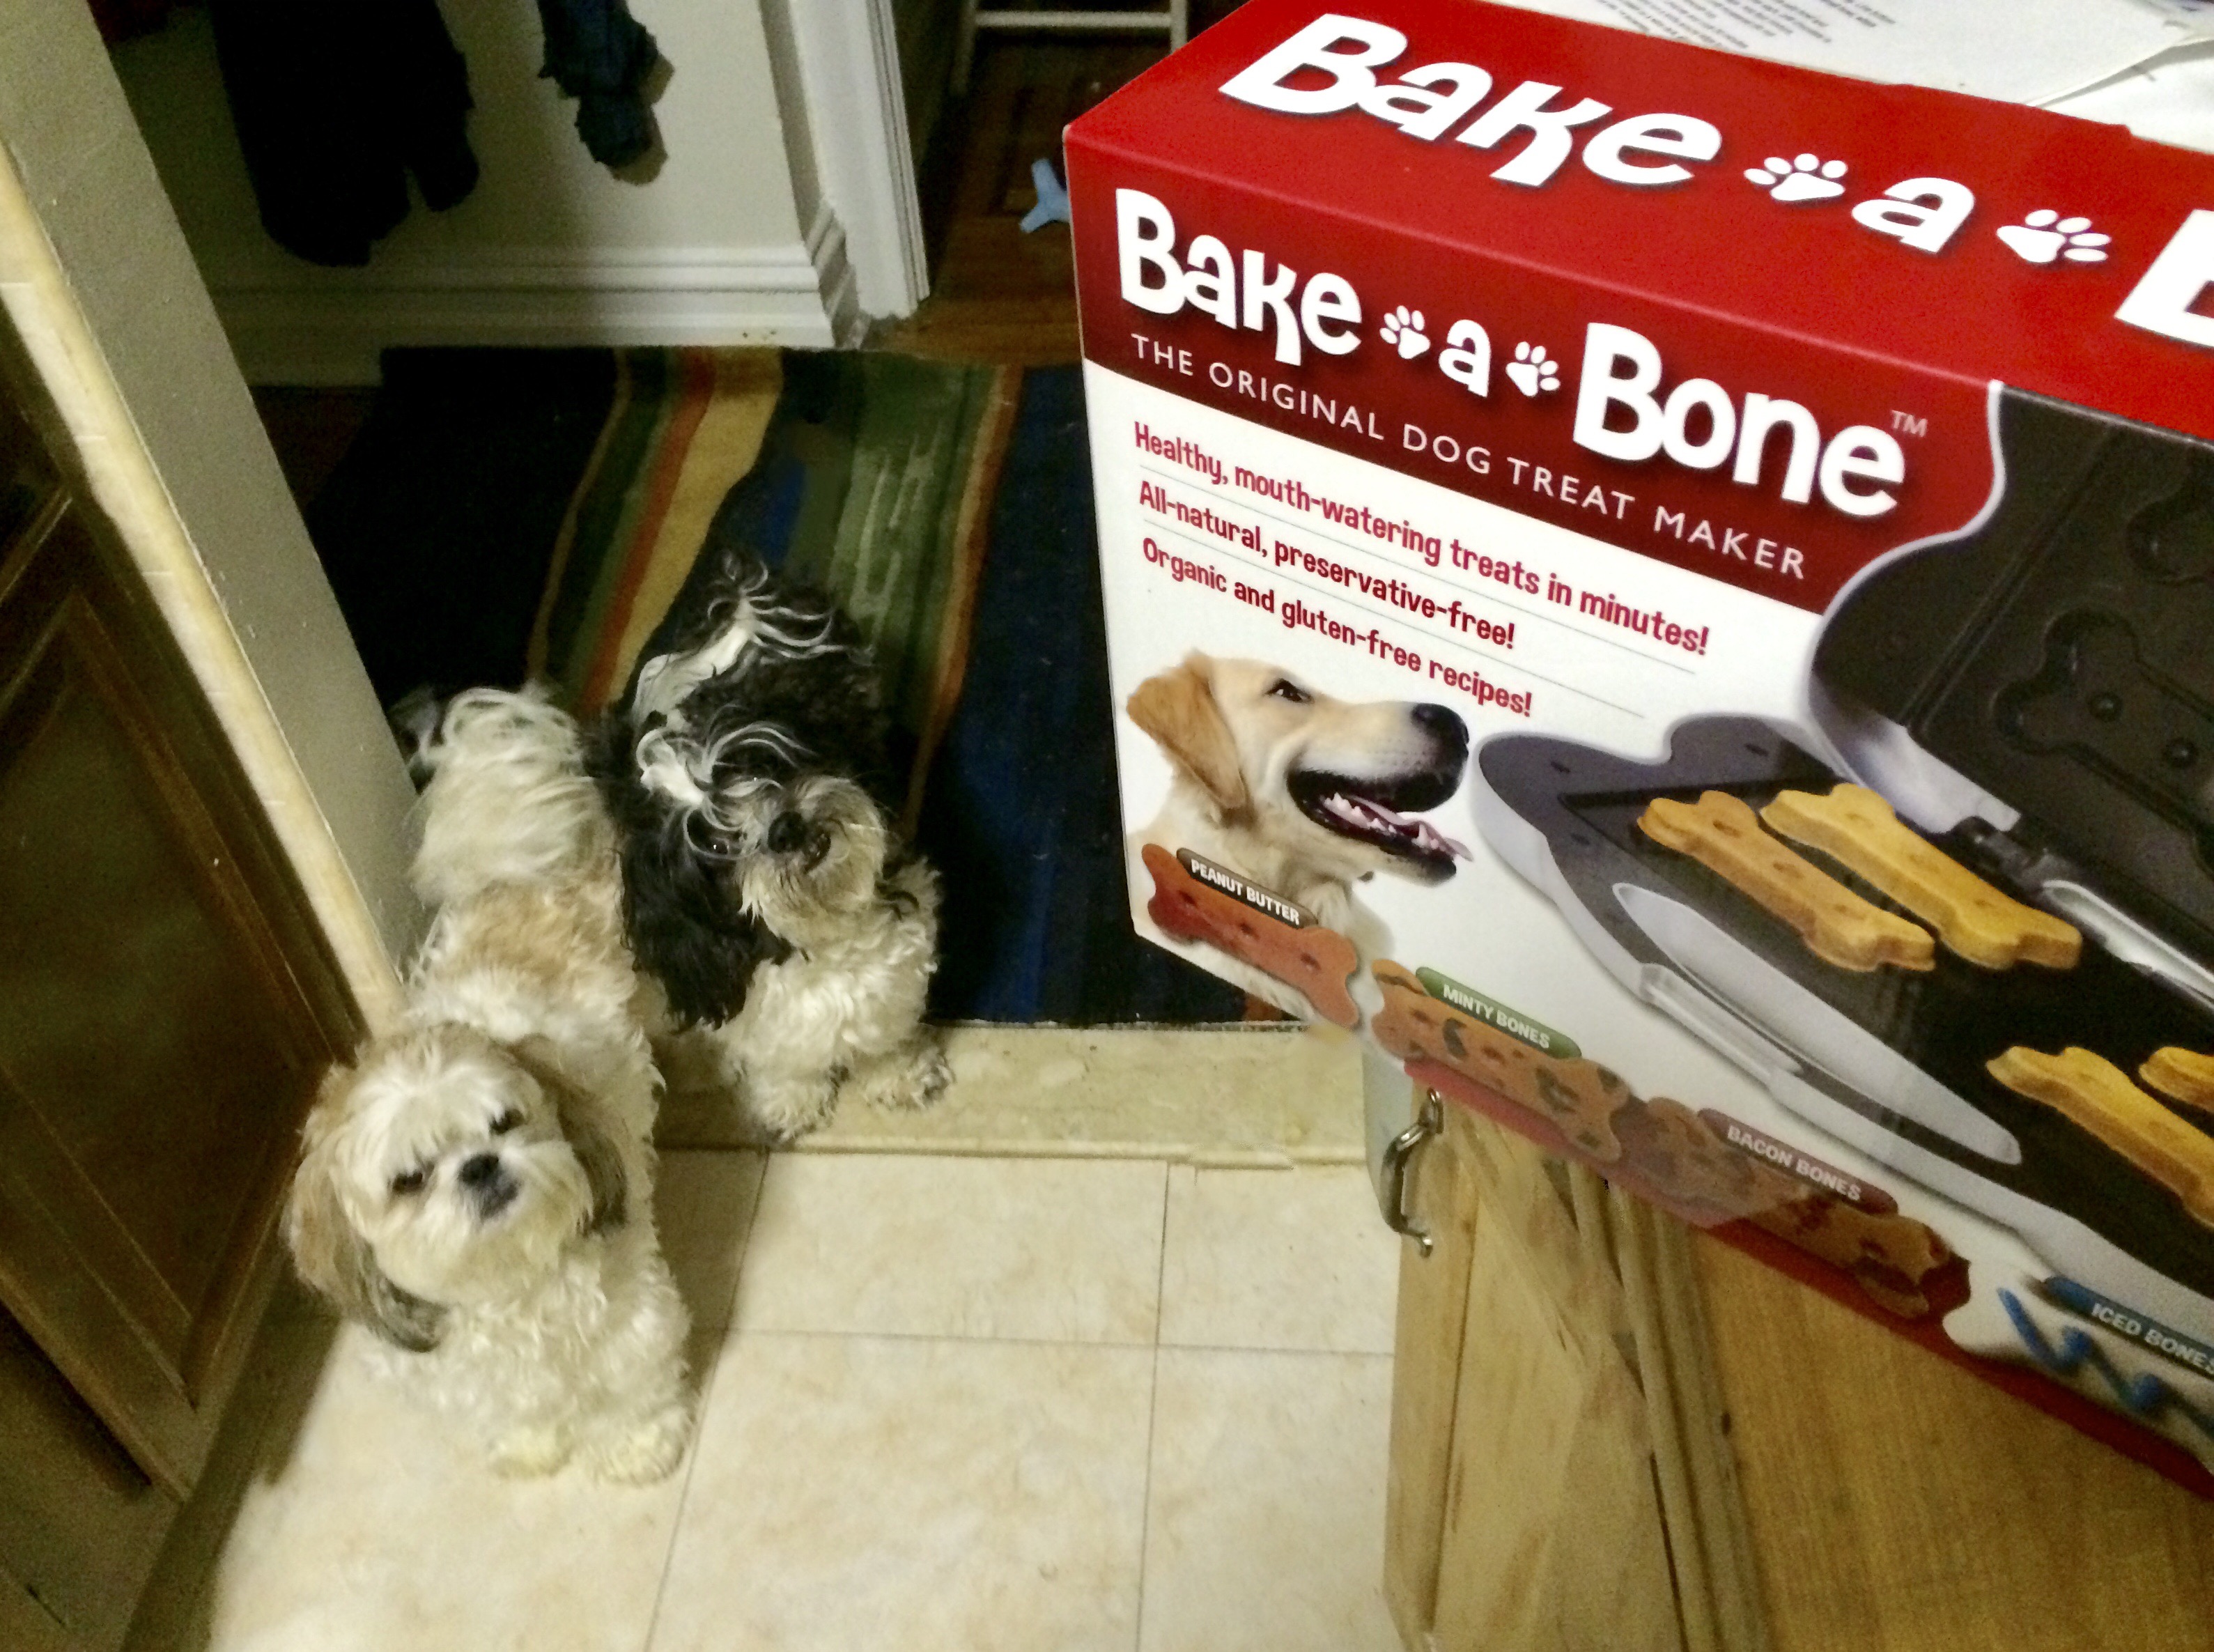
Note: there are two methods to make these treats. There is a product called Bake-A-Bone (much like a waffle iron, but shaped like dog bones, see below link to purchase), which we use, or you can use the oven method. I will leave instructions for both.
Directions
- Instructions using the Bake-a-Bone machine:
Note: Refer and fully read the Bake-a-Bone manual before operating to understand everything about it, including risks.
- Start by plugging in your Bake-a-Bone, when the green light comes on, it’s ready to use.
- Placing all ingredients in a large bowl. I take the peanut butter and put it in a microwave safe bowl and heat it for about a minute to melt it a bit – this makes it easier to work with. You can also put it over the stove in a double boiler, simmering water, for about 10 minutes to get the same affect.
- With a strong, large, silicone spatula or spoon, start to mix everything up really well, it will become the consistency of a paste.
- Open the Bake-a-Bone if the light has turned green. Using the spatula, put the batter in the Bake-a-Bone molds 1/8″ above each of the mold walls.
- Close the lid and let it bake for 10 minutes (for safety reasons, use a timer).
- Remove from Bake-A-Bone, trim off excess edges to make a clean ‘bone’ look. Cool on a rack for 30 minutes.
- This method will yield a slightly soft bone treat that is ready to feed. If you would like to make them dry and harder, simply put them on a cookie sheet (when done baking in the Bake-a-Bone) and place them in a 250 degree Fahrenheit oven for 45 minutes. Then turn the oven off and let them sit in the oven for an hour.
- Store the treats in an airtight container and refrigerate. (If you leave them in a treat jar at room temperature they could yield mold so definitely keep them refrigerated).
- If you make a large batch, keep half of them in an airtight container in the refrigerator and half of them in an airtight container in the freezer. Thaw before serving the frozen ones.
Directions
- Instructions for using your oven:
- Pre-heat your oven to 350 degrees Fahrenheit.
- Mix the same ingredients as listed above, but if the batter is too runny, add more whole wheat flour – you want it to form a texture like cookie dough. You can also add one egg to help make this texture.
- After fully mixing, place the batter on parchment paper on a cookie sheet. Place another long strip of parchment paper over the top of the batter and roll it down until the batter is about 1/2 inch thick on the cookie sheet. Discard the top layer of parchment paper.
- Using a cookie cutter of your choice, cut out the shapes of the treats, gathering excess dough and reshaping to use it all up.
- Place the cookie sheet in the pre-heated oven for 40 minutes. Turn the oven off and let them sit in the oven for an hour. Allow to cool before feeding and storing in airtight container in the refrigerator or storing in the freezer.
Note 1: You can also buy silicone pre shaped molds (see below link) – we have this as well, because you can make other kinds of treats that you can freeze for those hot summer months when they need a cooling down treat.
Note 2: Remember that often our furry loves are much smaller than we are. One treat bone can be the equivalent of humans eating it at the hotdog size portion. Feed your dog sparingly or use them as special rewards but don’t over feed them treats or use them as a supplement for their food. Trust me, they will love these and continually ask you for more~! Happy treat eating~!
Please keep in mind that all dog tips should first be consulted with your vet to make sure they fit the needs and special instructions your furry love’s Dr. advises. Especially with food that you give them.
Links to buy:
Bake-A-Bone The Original Dog Treat Maker
GYBest GGT01 Food Grade Large Ice Cube Trays, Silicone Baking Molds, 2-Pack, Red
King Arthur Flour Flour Premium 100% Whole Wheat 5 Lb 2 Packs
Teddie All Natural Peanut Butter, Smooth, 26-Ounce Jar (Pack of 3) (Packaging may